


Know what stays. Know what goes.
The printable shows the full, upright design. Check the folding notes below before choosing how to prepare the sheet.
Preserve narrow connections between shapes. Loose shapes need a backing sheet or separate placement; the drawing has not been physically tested for connectivity.
Watch the folds and cuts
The video has Chinese audio and on-screen text. Use the written chapter guide below to follow the actions. Times are chapter entry points.
The printable is a practice variation of this motif, with its own marked cutting lines. Compare the folding technique in the video and follow the printable contours for this design.
Unsure where to cut? Try the online studio The printable uses a round blank for an exact twelve-layer wedge; the video demonstrates a square-paper route.
From one A4 sheet to your paper cut
30° wedge · 12 layers
For this printable, first cut a circle from the square using the full-size circle on page 1. Fold left onto right (2 layers). Divide that semicircle into three 60° fans: fold the bottom third onto the middle, then the stacked middle onto the top (6). Halve this fan (12); the final wedge is 30°.
Start with a complete, uncut sheet. Each picture shows the paper before that step; red dashes mark only the next cuts. Keep the surrounding paper until the outside-cutting step.
1. Prepare the paper
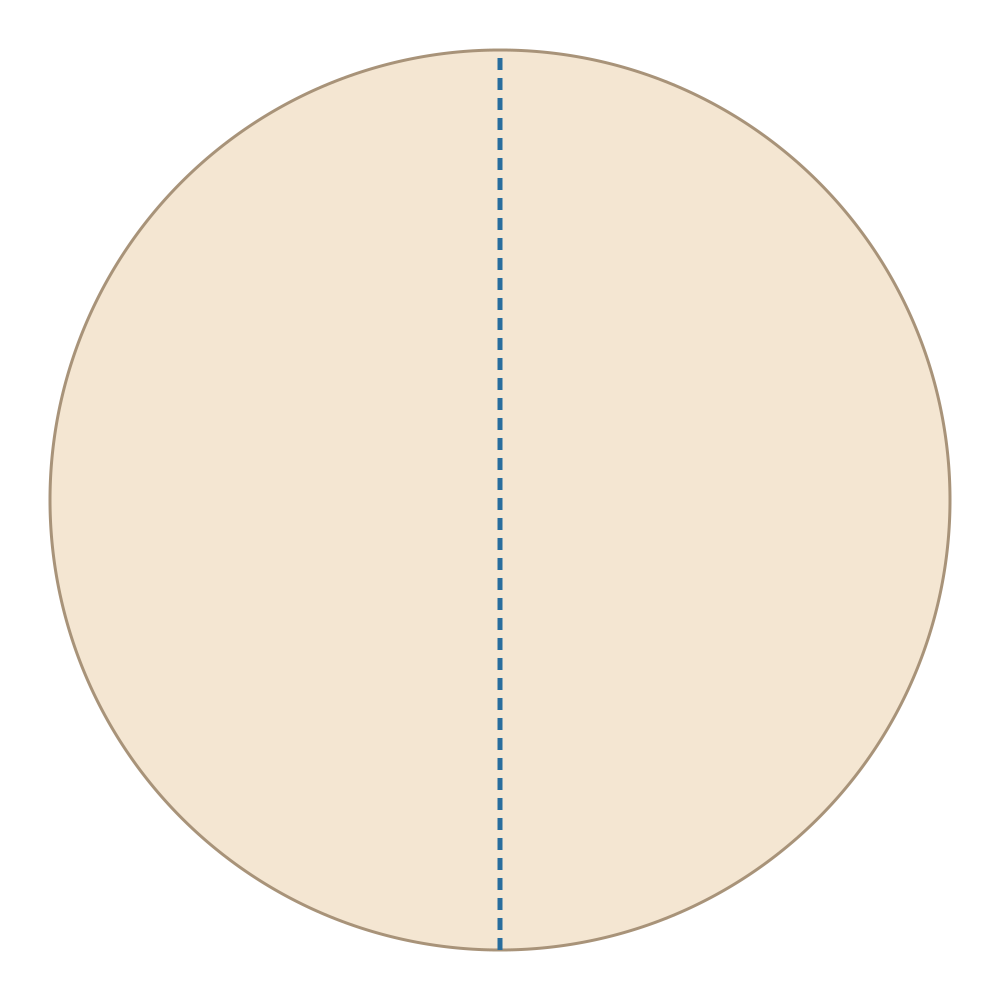
Print at 100%, check the 50 mm line and cut the round blank on page 1. Its center is the folding pivot.
2. Fold in this order
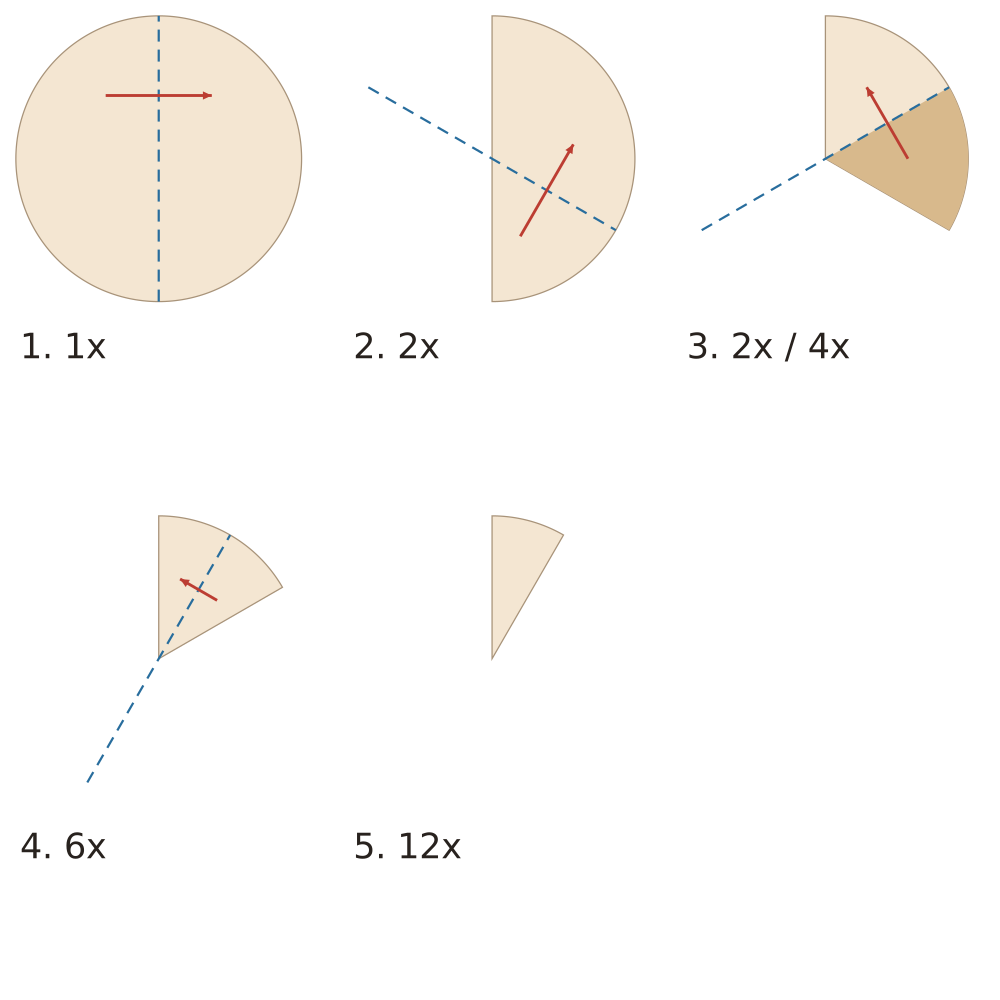
For this printable, first cut a circle from the square using the full-size circle on page 1. Fold left onto right (2 layers). Divide that semicircle into three 60° fans: fold the bottom third onto the middle, then the stacked middle onto the top (6). Halve this fan (12); the final wedge is 30°.
3. Cut the inner details first
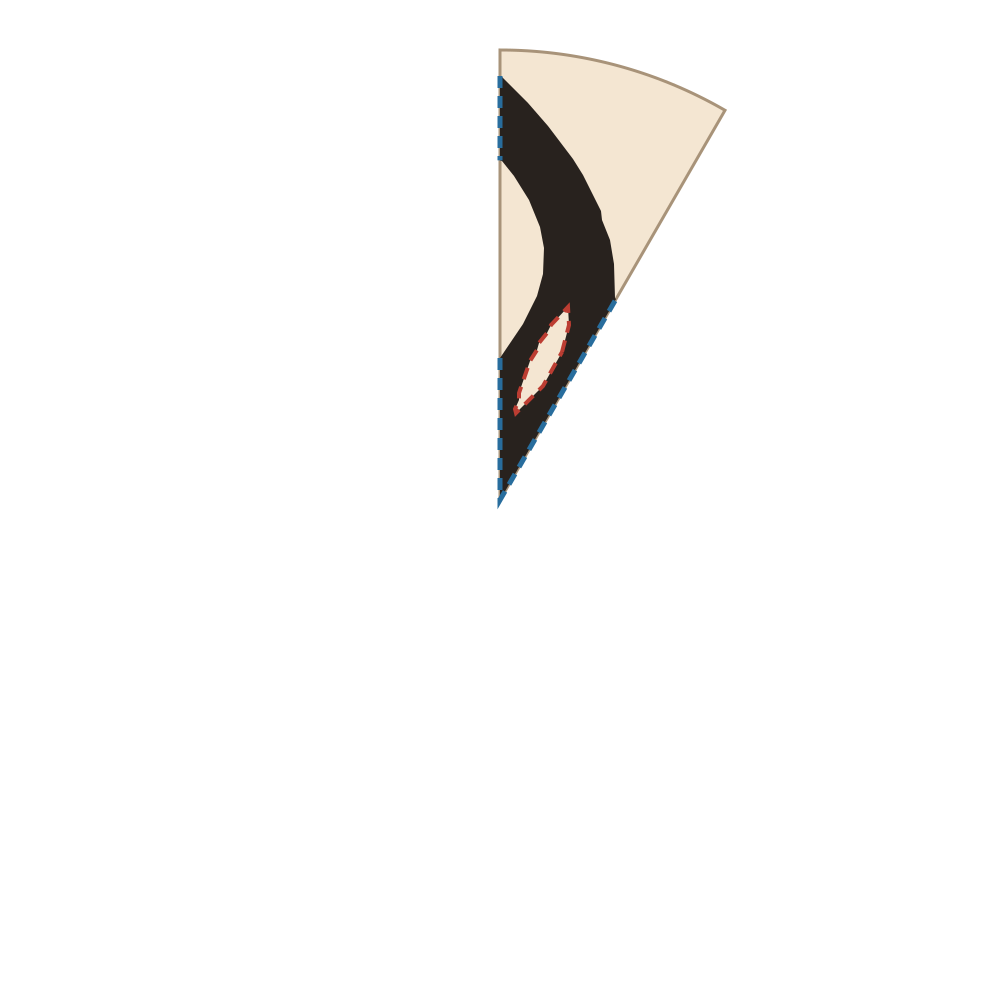
On the folded stack, cut the petal and leaf openings. Work on the red lines; the tan outer margin still supports the paper.
4. Cut the outer edge last
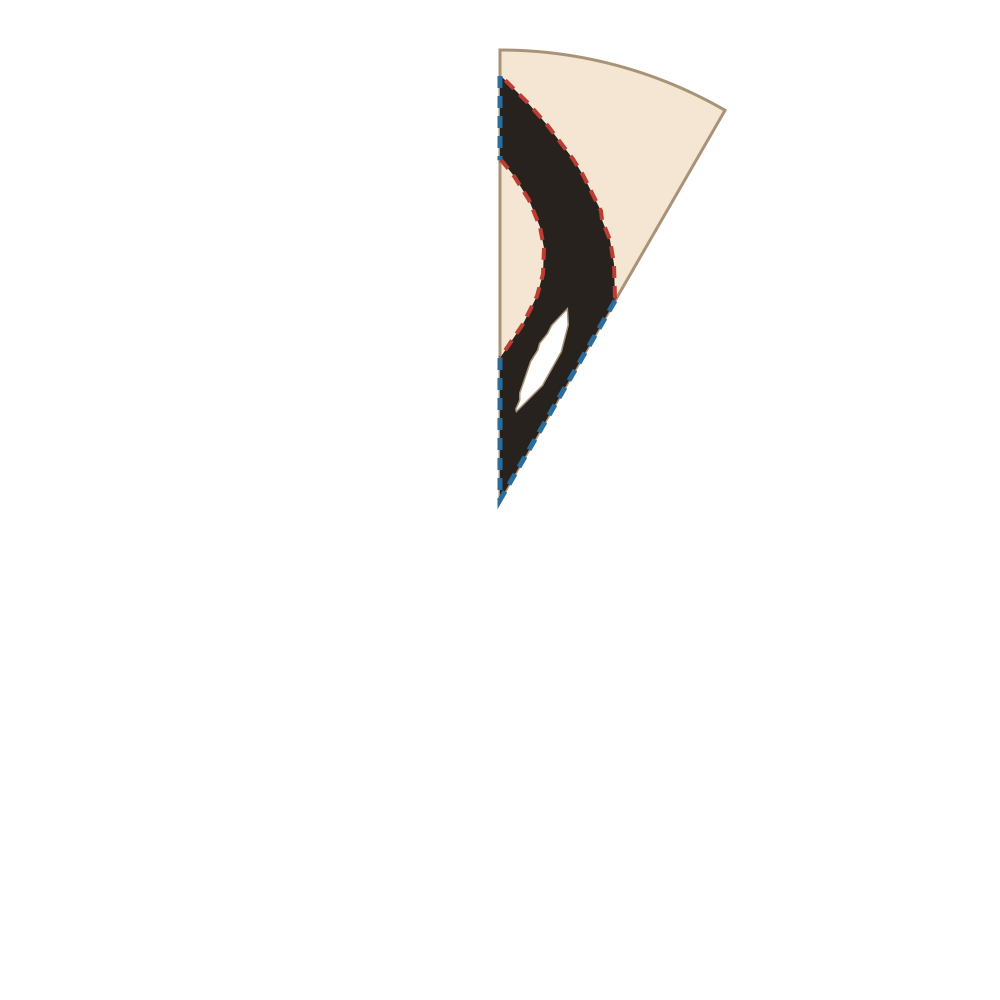
Follow the red outer contour on page 3 and discard the tan margin. Keep the black paper touching the blue folded edges connected.
5. Unfold in reverse order
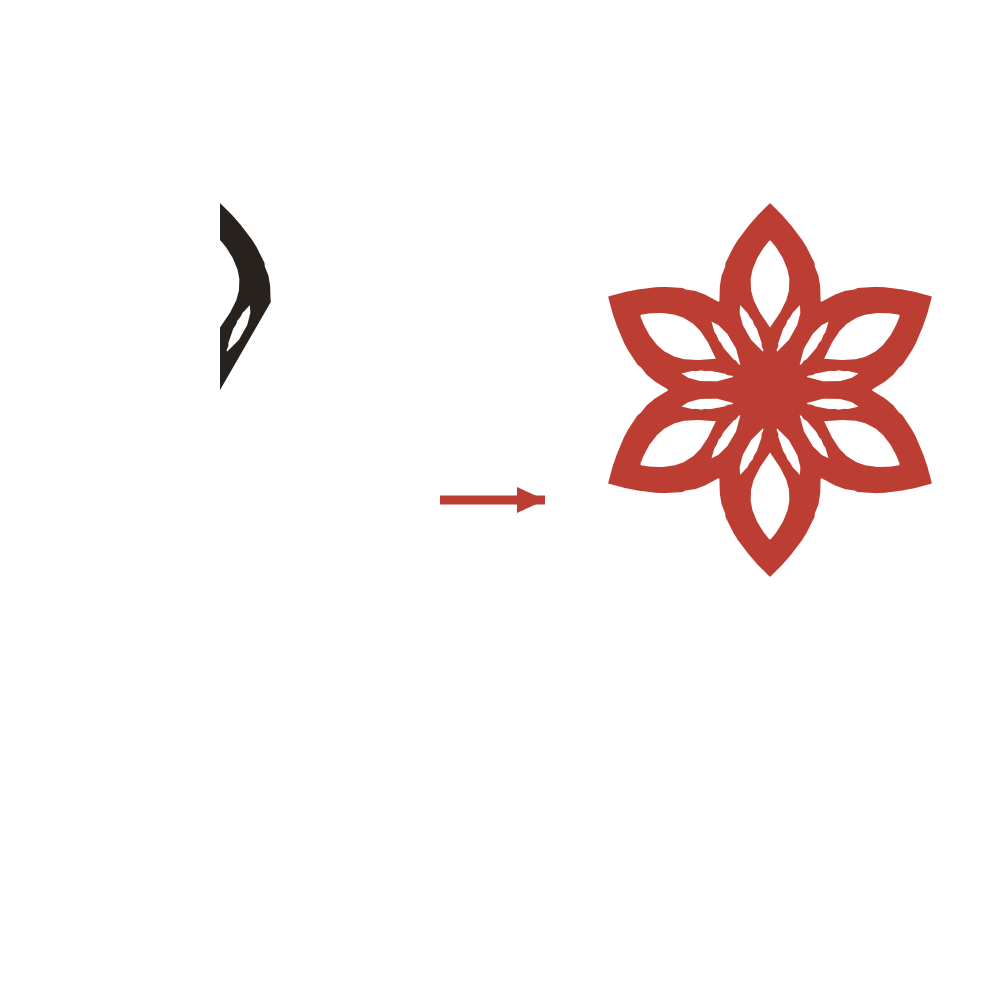
Separate the layers in reverse folding order. The folded unit repeats by reflection; compare every motif and connection with page 1.
6. Flatten the finished piece

Support the fine bridges and press between clean sheets. If unsure, try the matching paper and layer count in the online studio.
Blue dashes locate a fold; red marks the next cut. Keep the black connecting paper. Layer counts are calculated; paper strength has not been physically tested.
PDF page 1 is the full-size pattern and paper outline; page 2 shows the folds, page 3 the folded cuts, and the following pages the opening and finishing steps. A4 is the default; the Letter download uses a Letter sheet. Try a scrap first to check fragile bridges.
Print, prepare, and make
Match the PDF to your paper size and check the 50 mm scale line. Keep the pattern-specific folding sequence above beside you as you work.
Printing a paper cutting template · From download to finished paper cut · Printing and cutting troubleshooting
Paper and tools
Try the paper and tools on a scrap first. Difficulty and time are planning estimates; complete a trial before preparing a group activity.
Paper cutting tools and materialsAbout this template
Pointed petals and nested openings make a six-petal window decoration. The PDF is a cutting study; the SVG contains editable vector outlines.