

Know what stays. Know what goes.
The cutting guide shows the folded 30-degree working wedge. Read the retained black paper and marked waste together; an opening in the unfolded picture may meet a folded edge in this guide.
Preserve narrow connections between shapes. Loose shapes need a backing sheet or separate placement; the drawing has not been physically tested for connectivity.
Print the right guide for this snowflake
Choose A4 or US Letter to match the paper loaded in your printer. Print at 100% / Actual size, turn off Fit to page and browser headers and footers, then measure the 50 mm calibration line. If it is not exactly 50 mm, correct the print settings before tracing.
- Page 1 — unfolded reference and round blank. Cut the 180 mm circle shown on the first page. A4 and Letter use the same design size; the page margins differ.
- Page 2 — folding sequence. Follow the half thirds half sequence. Keep the original center as the pointed end.
- Page 3 — full-size working wedge. Match the point and both straight fold edges to your folded paper before tracing. This is the sheet to use for folded cutting.
- Page 4 — cutting and opening order. Keep these step illustrations beside you; they are not full-size tracing patterns.
The SVG and PNG show the unfolded artwork. Use the PDF working wedge for folded paper. A small screen preview or a resized image is not a substitute for the calibrated sheet. SVG cutting-machine compatibility has not been tested.
Choose paper and tools for this pattern
Use thin paper that remains manageable when folded into twelve layers. Test a small folded scrap with your scissors before tracing the whole design. Thick card or slippery stacked sheets can make fine turns harder; use one circle per trial and stop if you have to force the tool.
The openings in this folded working guide meet an edge. Begin those cuts from the indicated edge instead of piercing through a retained stem. Small scissors may suit the accessible contours, but check the folded thickness and your ability to turn the paper first. A ruler checks the print scale; a light pencil or low-tack tape helps transfer the guide without shifting the layers.
Difficulty and time are planning estimates, not measured cutting results. Make one trial before choosing quantities or timing for a class. The snowflake materials guide explains how to prepare the paper and tools.
Read the Pine Branch Snowflake pattern
Pine Branch has open spaces between three pairs of side twigs on each main arm. There are no enclosed holes, but there are more direction changes than in Arrow Crystal. The aim is to remove each gap while keeping the main spine and the roots of its smaller twigs.
- Follow the main spine
- Trace a continuous black route from the center to the end of an arm. All the side twigs attach to this spine. Keep its width consistent instead of cutting a straight line through several neighboring gaps.
- Read the three twig levels
- Each arm has side twigs at three distances from the center. Their lengths are intentionally different, with shorter twigs near the tip. The finished reference helps you distinguish that variation from a cutting mistake.
- Mark each twig root
- At every fork, the white gap ends beside a black join. These stopping points matter more than making all the open gaps look equally wide. Keep them visible on your tracing.
Explore this pattern in the snowflake maker · Follow the six-point folding tutorial
Fold and cut your six-point snowflake
Circle paper • 30-degree sector • 12 layers
Start with a 180 mm circle. Fold in half, fold the semicircle in thirds to make a 60-degree sector, then fold that sector in half. The final 30-degree wedge has 12 layers; its pointed tip is the original paper center.
Start with the round blank on PDF page 1. The step illustrations show the sequence; use page 3 for tracing at actual size. Keep supporting paper until the outside-cutting step.
1. Prepare the circle
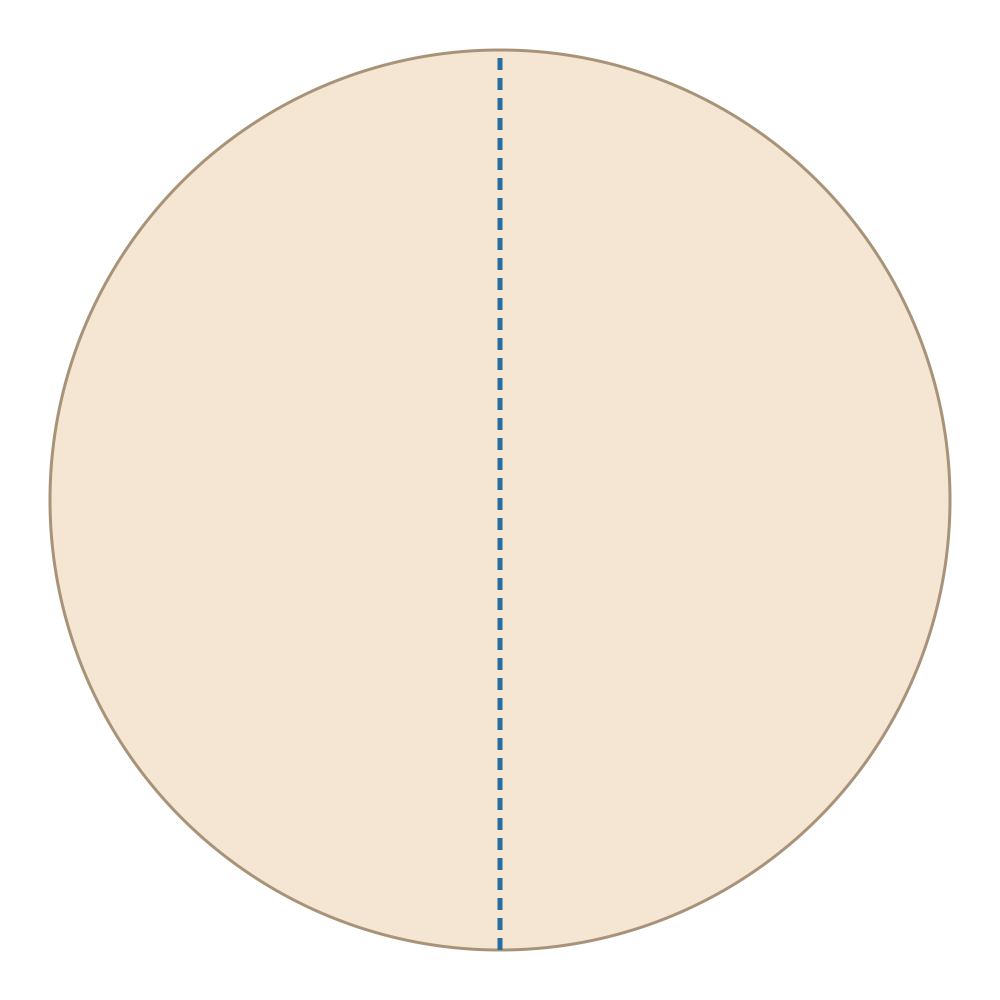
Print the matching PDF at 100% and check the 50 mm line. Cut a 180 mm circle from thin paper using the gray outline on page 1. Mark its center lightly; it will become the pointed end of every fold.
2. Fold to a 30-degree wedge
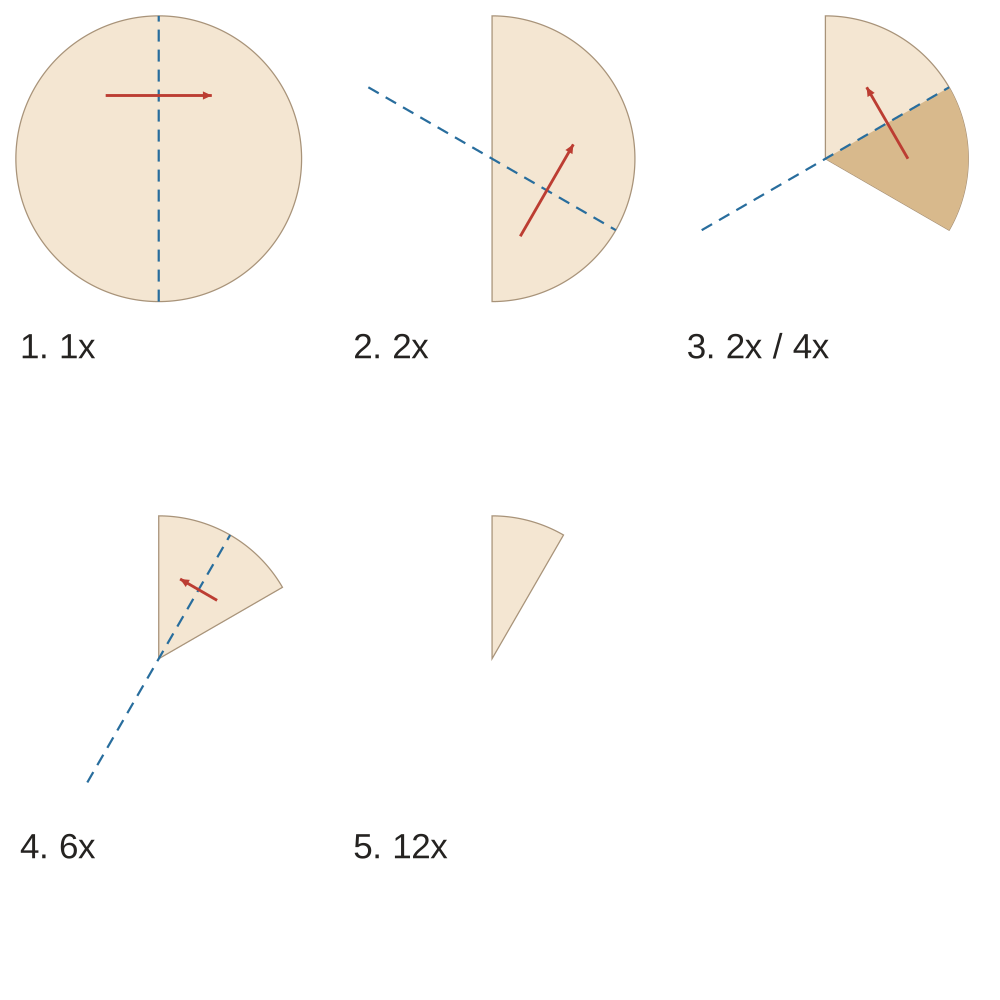
Fold the circle in half. Divide the semicircle into three equal 60-degree sectors and fold both sides inward. Fold the resulting 60-degree stack in half once more. Keep all 12 layers aligned; the rounded edge is away from the center. Align the center tip and both folded edges with the full-size guide on PDF page 3, then trace its cutting contours.
3. Check the retained connections
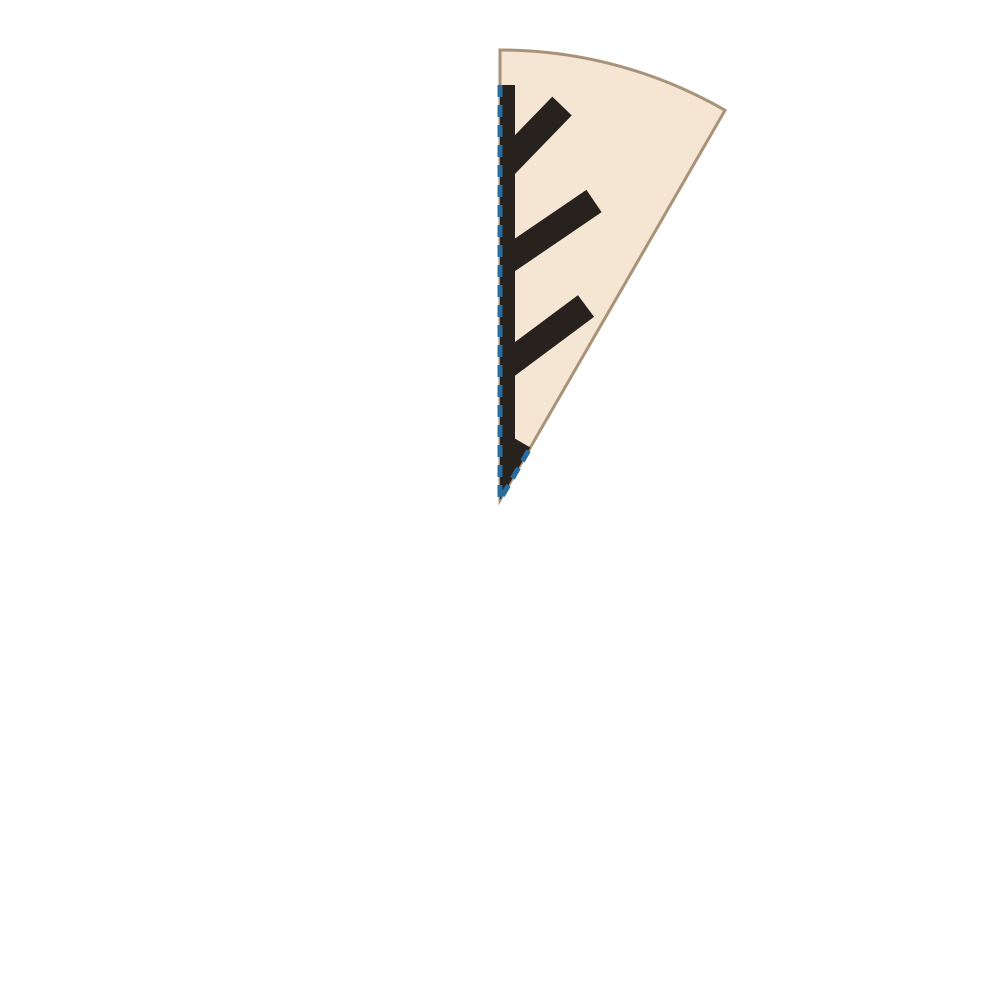
This design has no enclosed holes to cut at this stage. Check the black center and branch connections against your traced guide. Leave the paper intact, then continue to the outside contour in step 4.
4. Cut the outside silhouette
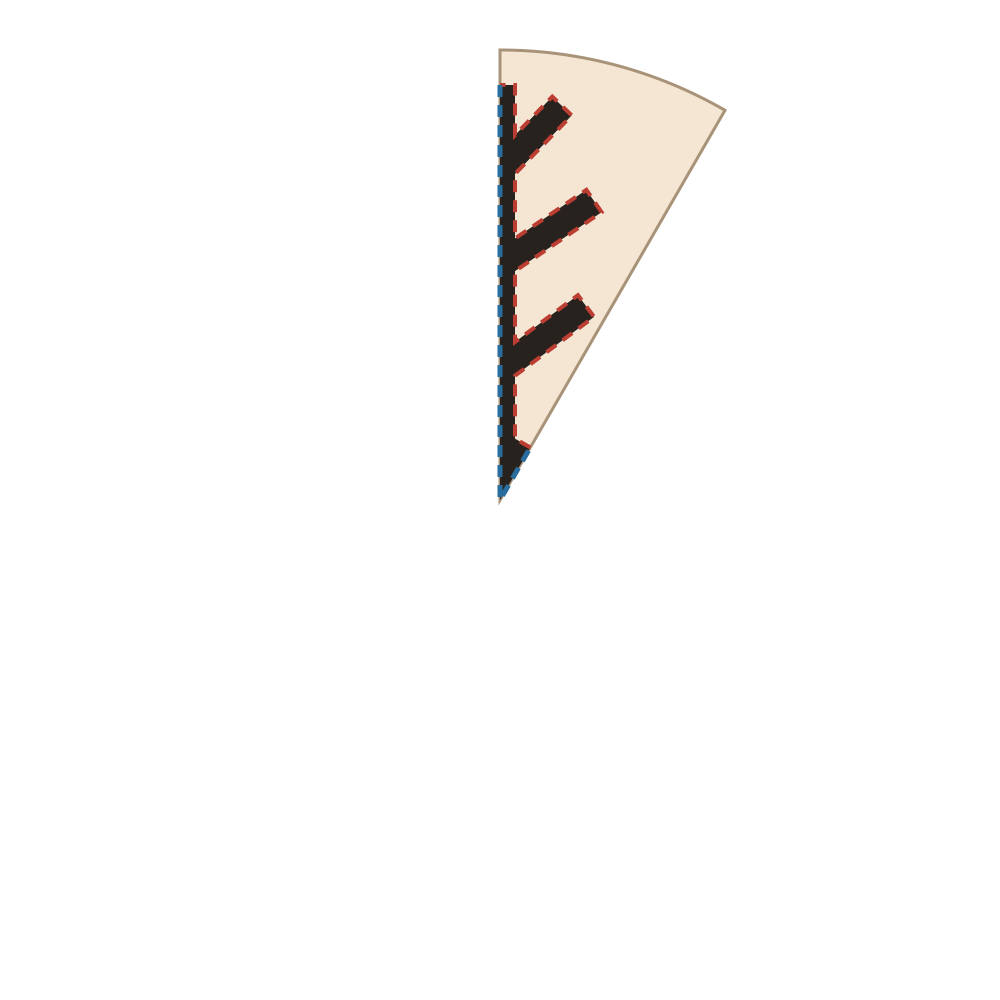
Follow the red outside contour while retaining the black paper. Remove the spaces between twigs without cutting through their main stems. Blue dashed marks locate folded edges; do not cut along them. Support the stack and turn the paper for corners.
5. Open the layers gently
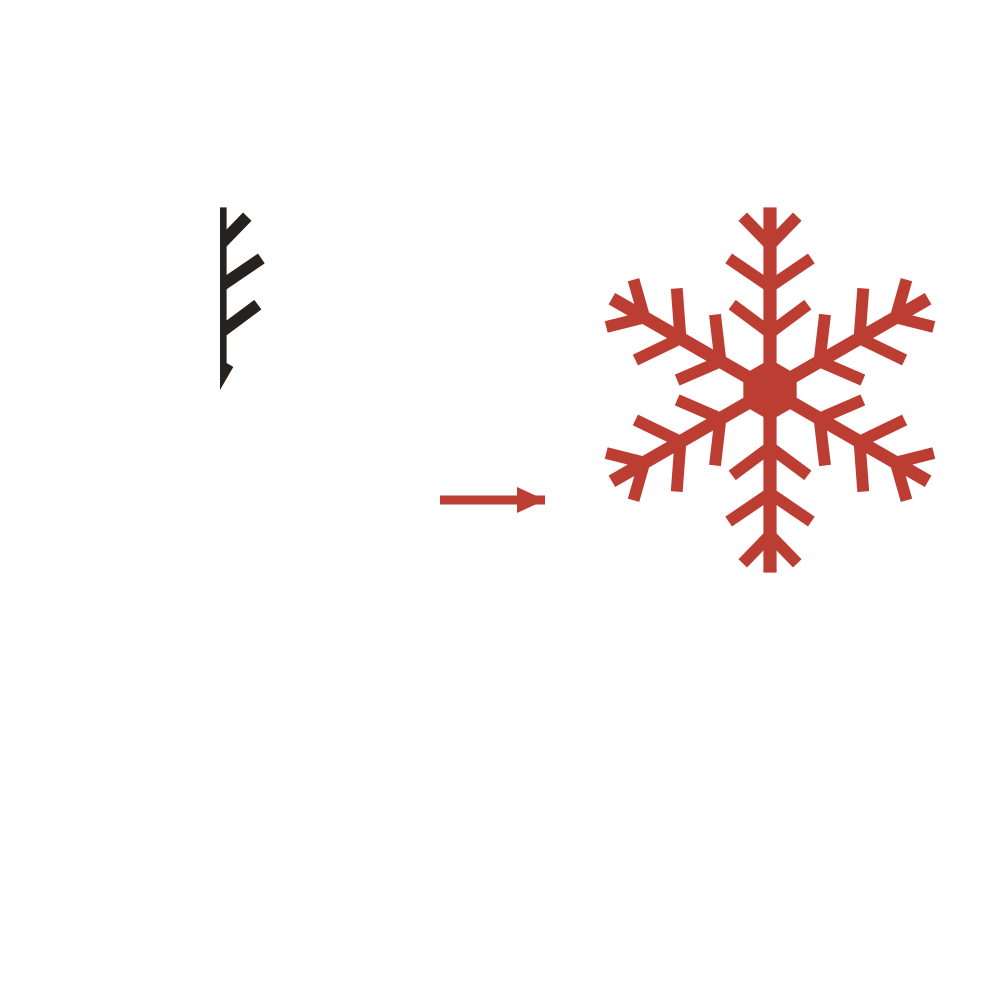
Separate the last fold first, then open the thirds and finally the semicircle. Support the center and release each branch without pulling on its tip. The 30-degree cut unit repeats by reflection to make six matching arms.
6. Flatten and display

Lay pine branch snowflake between clean sheets under a book. Use small removable tape tabs on broad areas for a window display, or mount it flat on a contrasting card. Save the SVG if you want to edit the geometry.
Print the PDF at 100% or Actual size. Its 50 mm check line must measure 50 mm. The full circle and folded guide use the same scale. Difficulty and time are planning estimates; this design has not been physically trial-cut.
Use the matching PDF working wedge for tracing; the step pictures are illustrations. A4 is the default; the Letter download uses a Letter sheet. Try a scrap first to check fragile bridges.
Cutting checks for Pine Branch Snowflake
- Treat each gap as a separate cut
- Work along the marked outside contour and turn the paper at a fork. Do not continue one diagonal cut through the spine to reach the next gap on the other side.
- Keep released twigs out of the scissors
- As more waste comes away, support the folded arm behind the next cut. A previously cut twig can bend into the blades if you hold only the loose outer margin.
- Separate branches one layer at a time
- During opening, check that the small fork corners are fully cut before moving each twig. Lay the opened snowflake flat before adjusting any branch that appears curled.
If the layers stop lining up, pause before making another cut. Compare the folded tip and edges with PDF page 3. If a piece has already detached, a backing can hold it for display, but it will no longer be a connected paper cut.
Pine Branch Snowflake: common questions
Should I make small holes inside the pine branches?
No. This design uses an open silhouette. The light spaces between the twigs connect to the outside, and the main spines stay solid. The preparation stage is for checking those joins, not for adding decorative perforations.
Why are some side twigs shorter than others?
The template varies the twig lengths along each arm. Compare matching positions on different arms, rather than expecting every twig on one arm to have the same length. Shortening the longer twigs to match would change the intended outline.
A twig tears off while unfolding. What should I check?
Look at its fork: the gap may have been cut too deeply, leaving a narrow root, or a tiny uncut corner may have held two layers together. Use the reference to check the root width, and release remaining joins carefully before opening the next layer.
For general fold alignment and print-size problems, see the snowflake troubleshooting guide. To try a different structure, compare the 20 paper snowflake templates.